Step 1:
Design any animated blog header and save it as gif. file.
Step 2:
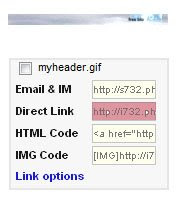
Upload gif. file to photobucket.
If you do not yet have account with photobucket, you can register for free.
Step 3:
Put mouse over the picture, and select and copy Direct Link.

Step 4:
Log in your blogger account, select Layout, click on Edit in Blog Headers.
Step 5:
Select From the web option, and past the Direct Link that you just copy.
You will see the your blog header animated now. Click Save.
Step 6:
Save your layout and view your blog.
If you want to see sample, click HERE
View blog reactions


0 comments:
Post a Comment